Develop - Create a New Project
This page will walk you through how to set up a project using our SDK.
Step 1. Add the path to slc_dll.dll to the Path system variable
In Windows, navigate to Edit the system environment variables → Environment Variables. The new entry to the path system variable should be the <path to DaoAI Studio>\SDK\bin.
Step 2. Update include directories in Visual Studio
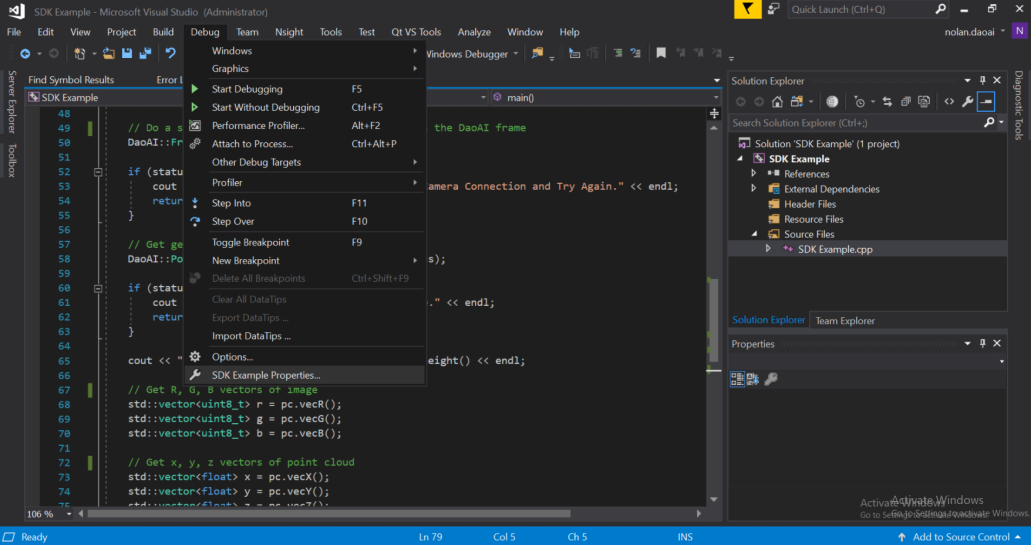
In Visual Studio, navigate to Debug → SDK Example Properties. You’ll need to stay in the Properties menu for the remaining steps as well.
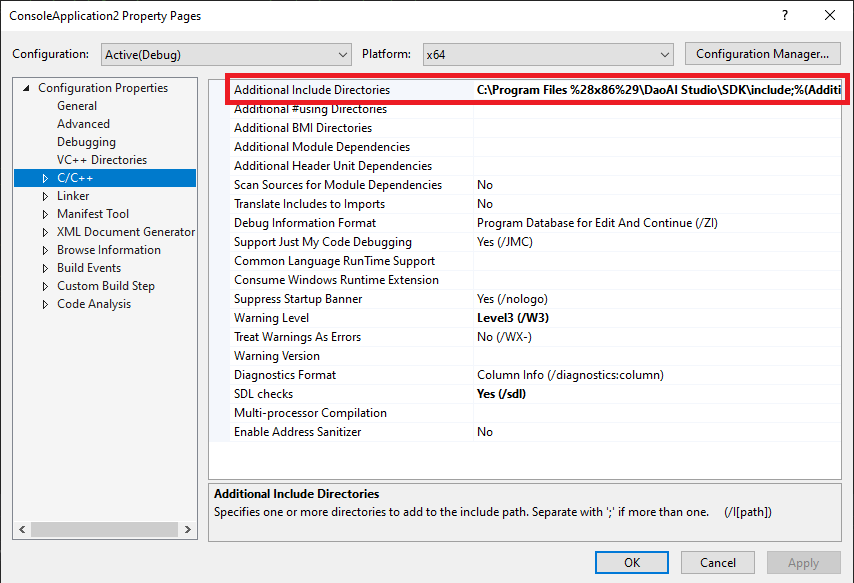
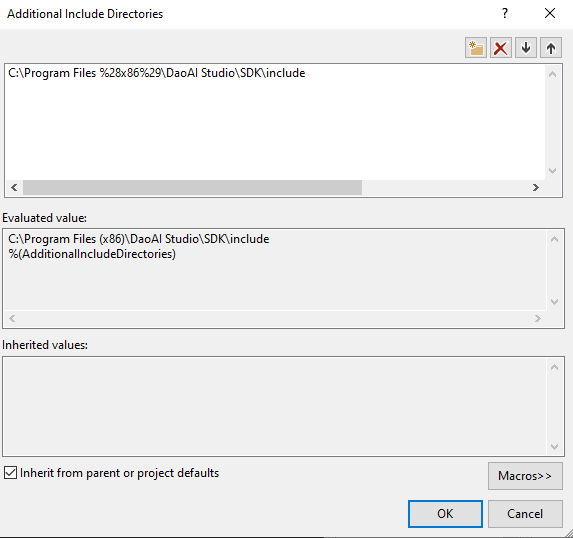
When making changes to the project properties, make sure the Configuration and Platform are set correctly (Release, x64). To update the include directories, first navigate to Additional Include Directories under C/C++ → General, click on the field’s dropdown arrow and click Edit, and add the path to the SDK include directory, which contains the library header files. Usually is <path to SLC>/SDK/include.
Step 3. Update linker settings in Visual Studio
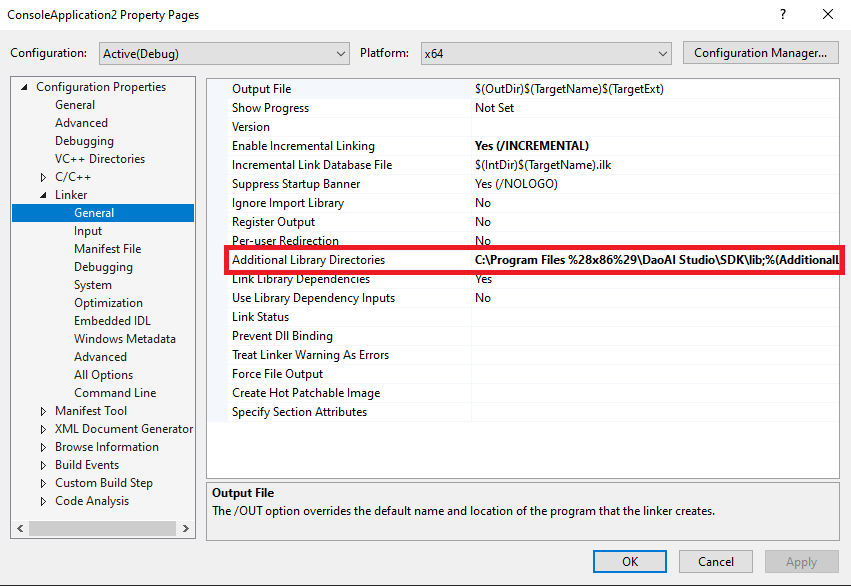
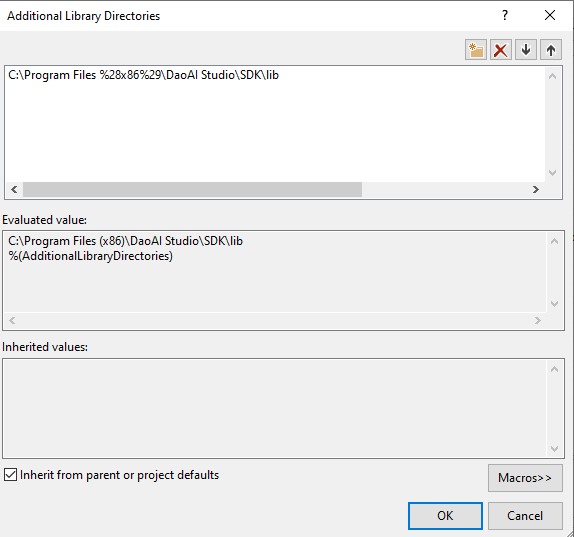
Navigate to Linker → General, click on Additional Library Directories dropdown arrow and click Edit, and add the path to the SDK lib directory, which contains the .lib library object files that need to be linked. Usually is <path to SLC>/SDK/lib.
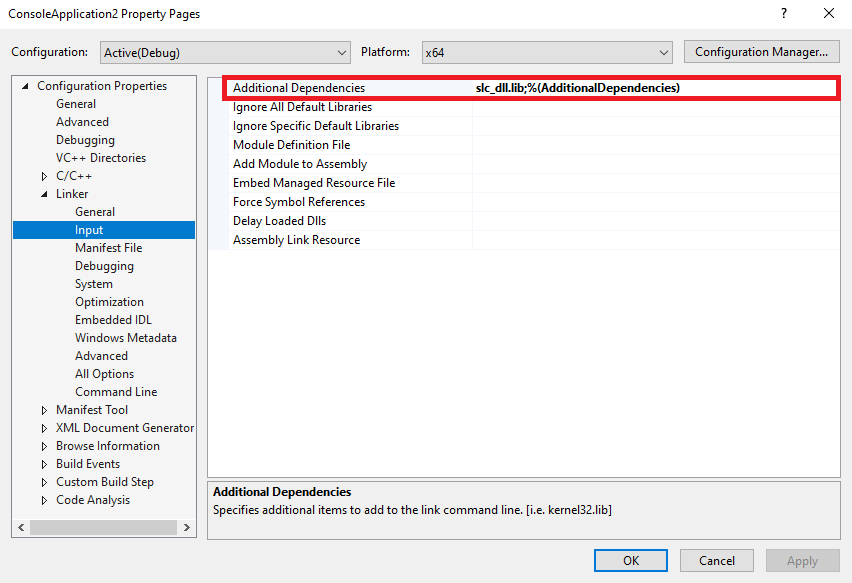
Step 4. Add Dependency
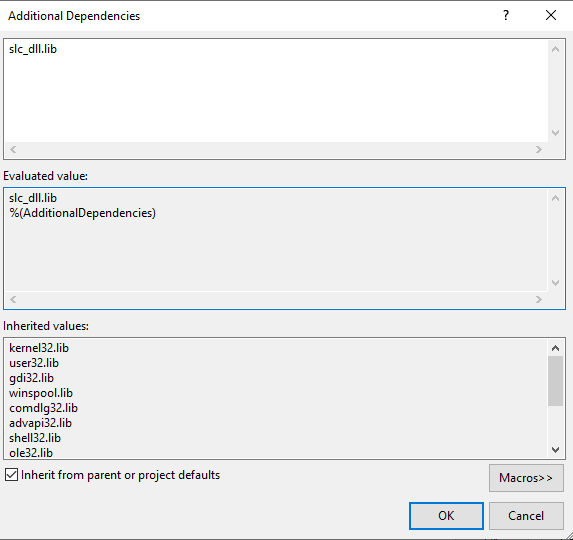
Navigate to Linker → Input, click on Additional Dependencies dropdown arrow and click Edit, and add slc_dll.lib as an entry.
When you are finished these steps, apply the changes and click OK.