Connectivity and Power Supply
Hardware Setup
This page will provide instructions on how to connect your DaoAI camera to be used with DaoAI Camera Studio.
To set up the camera, plug in the power cable and connect it to your machine that has Camera Studio installed via USB (Or Ethernet for remote controlled cameras)
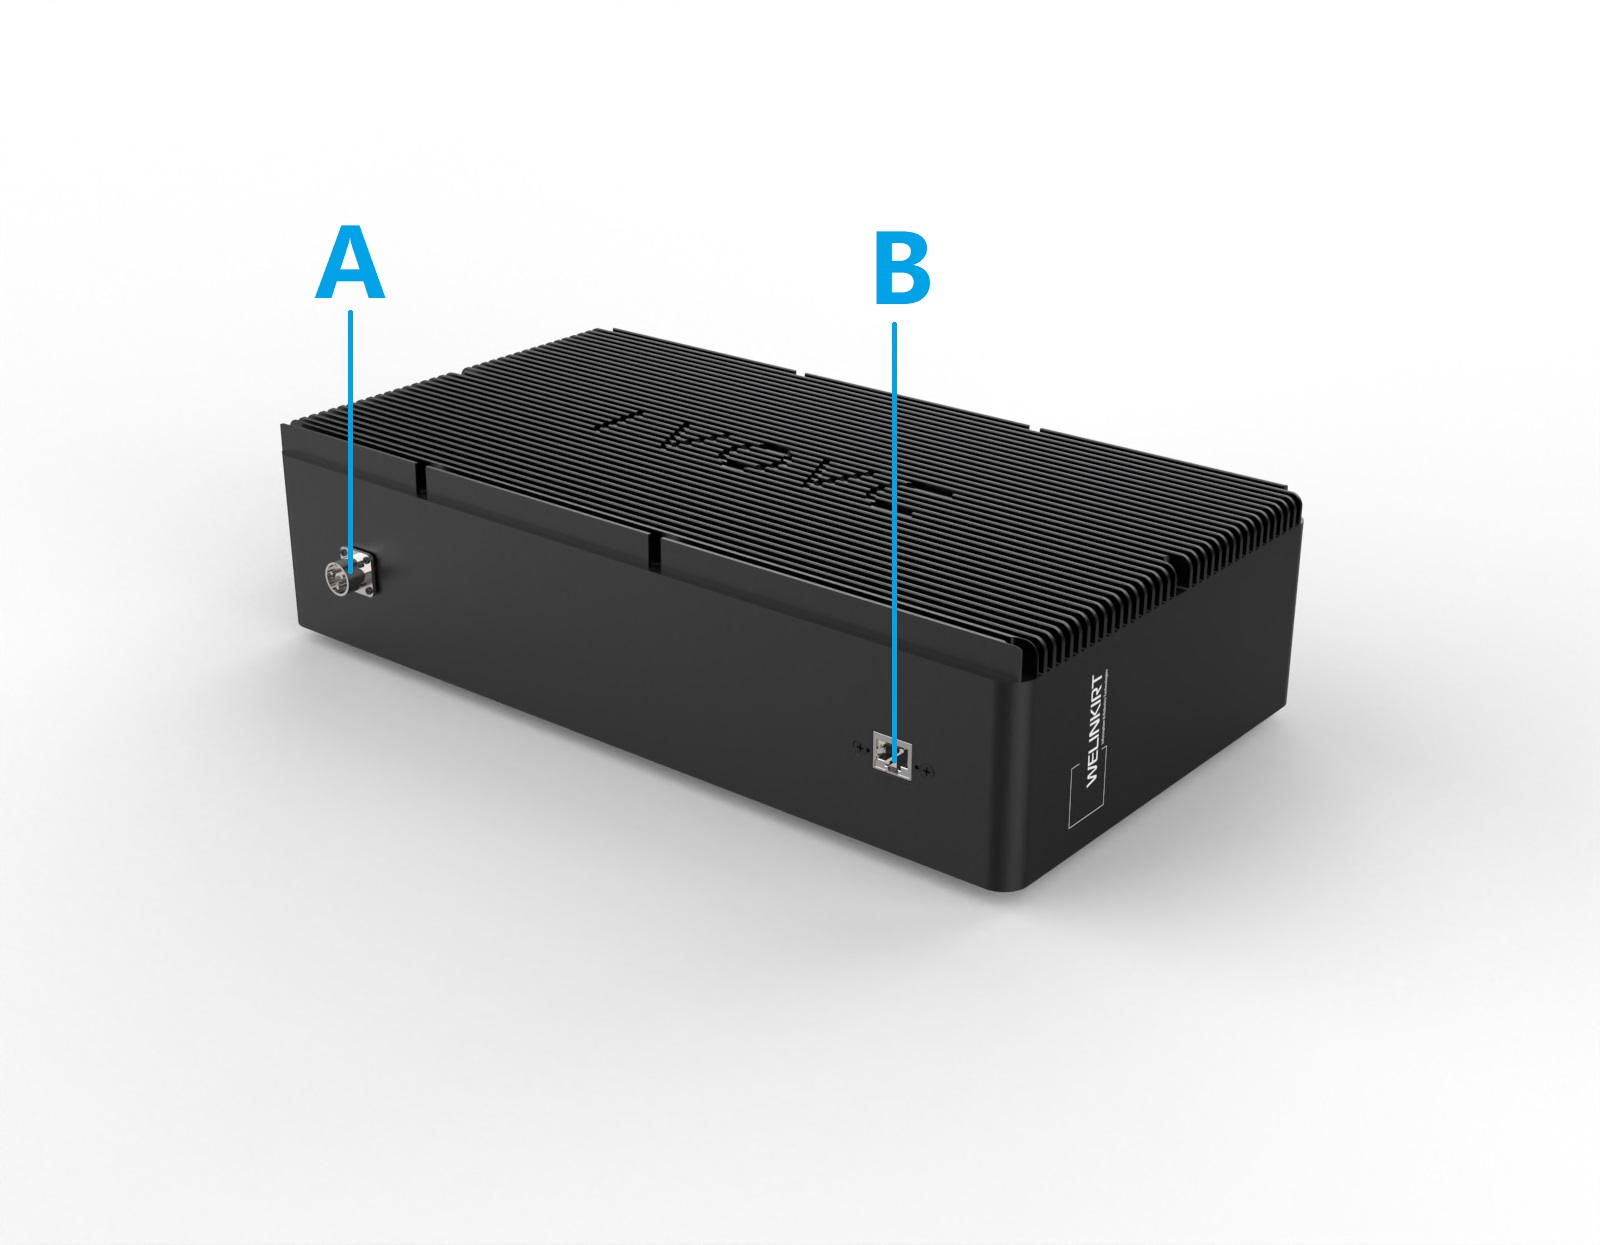
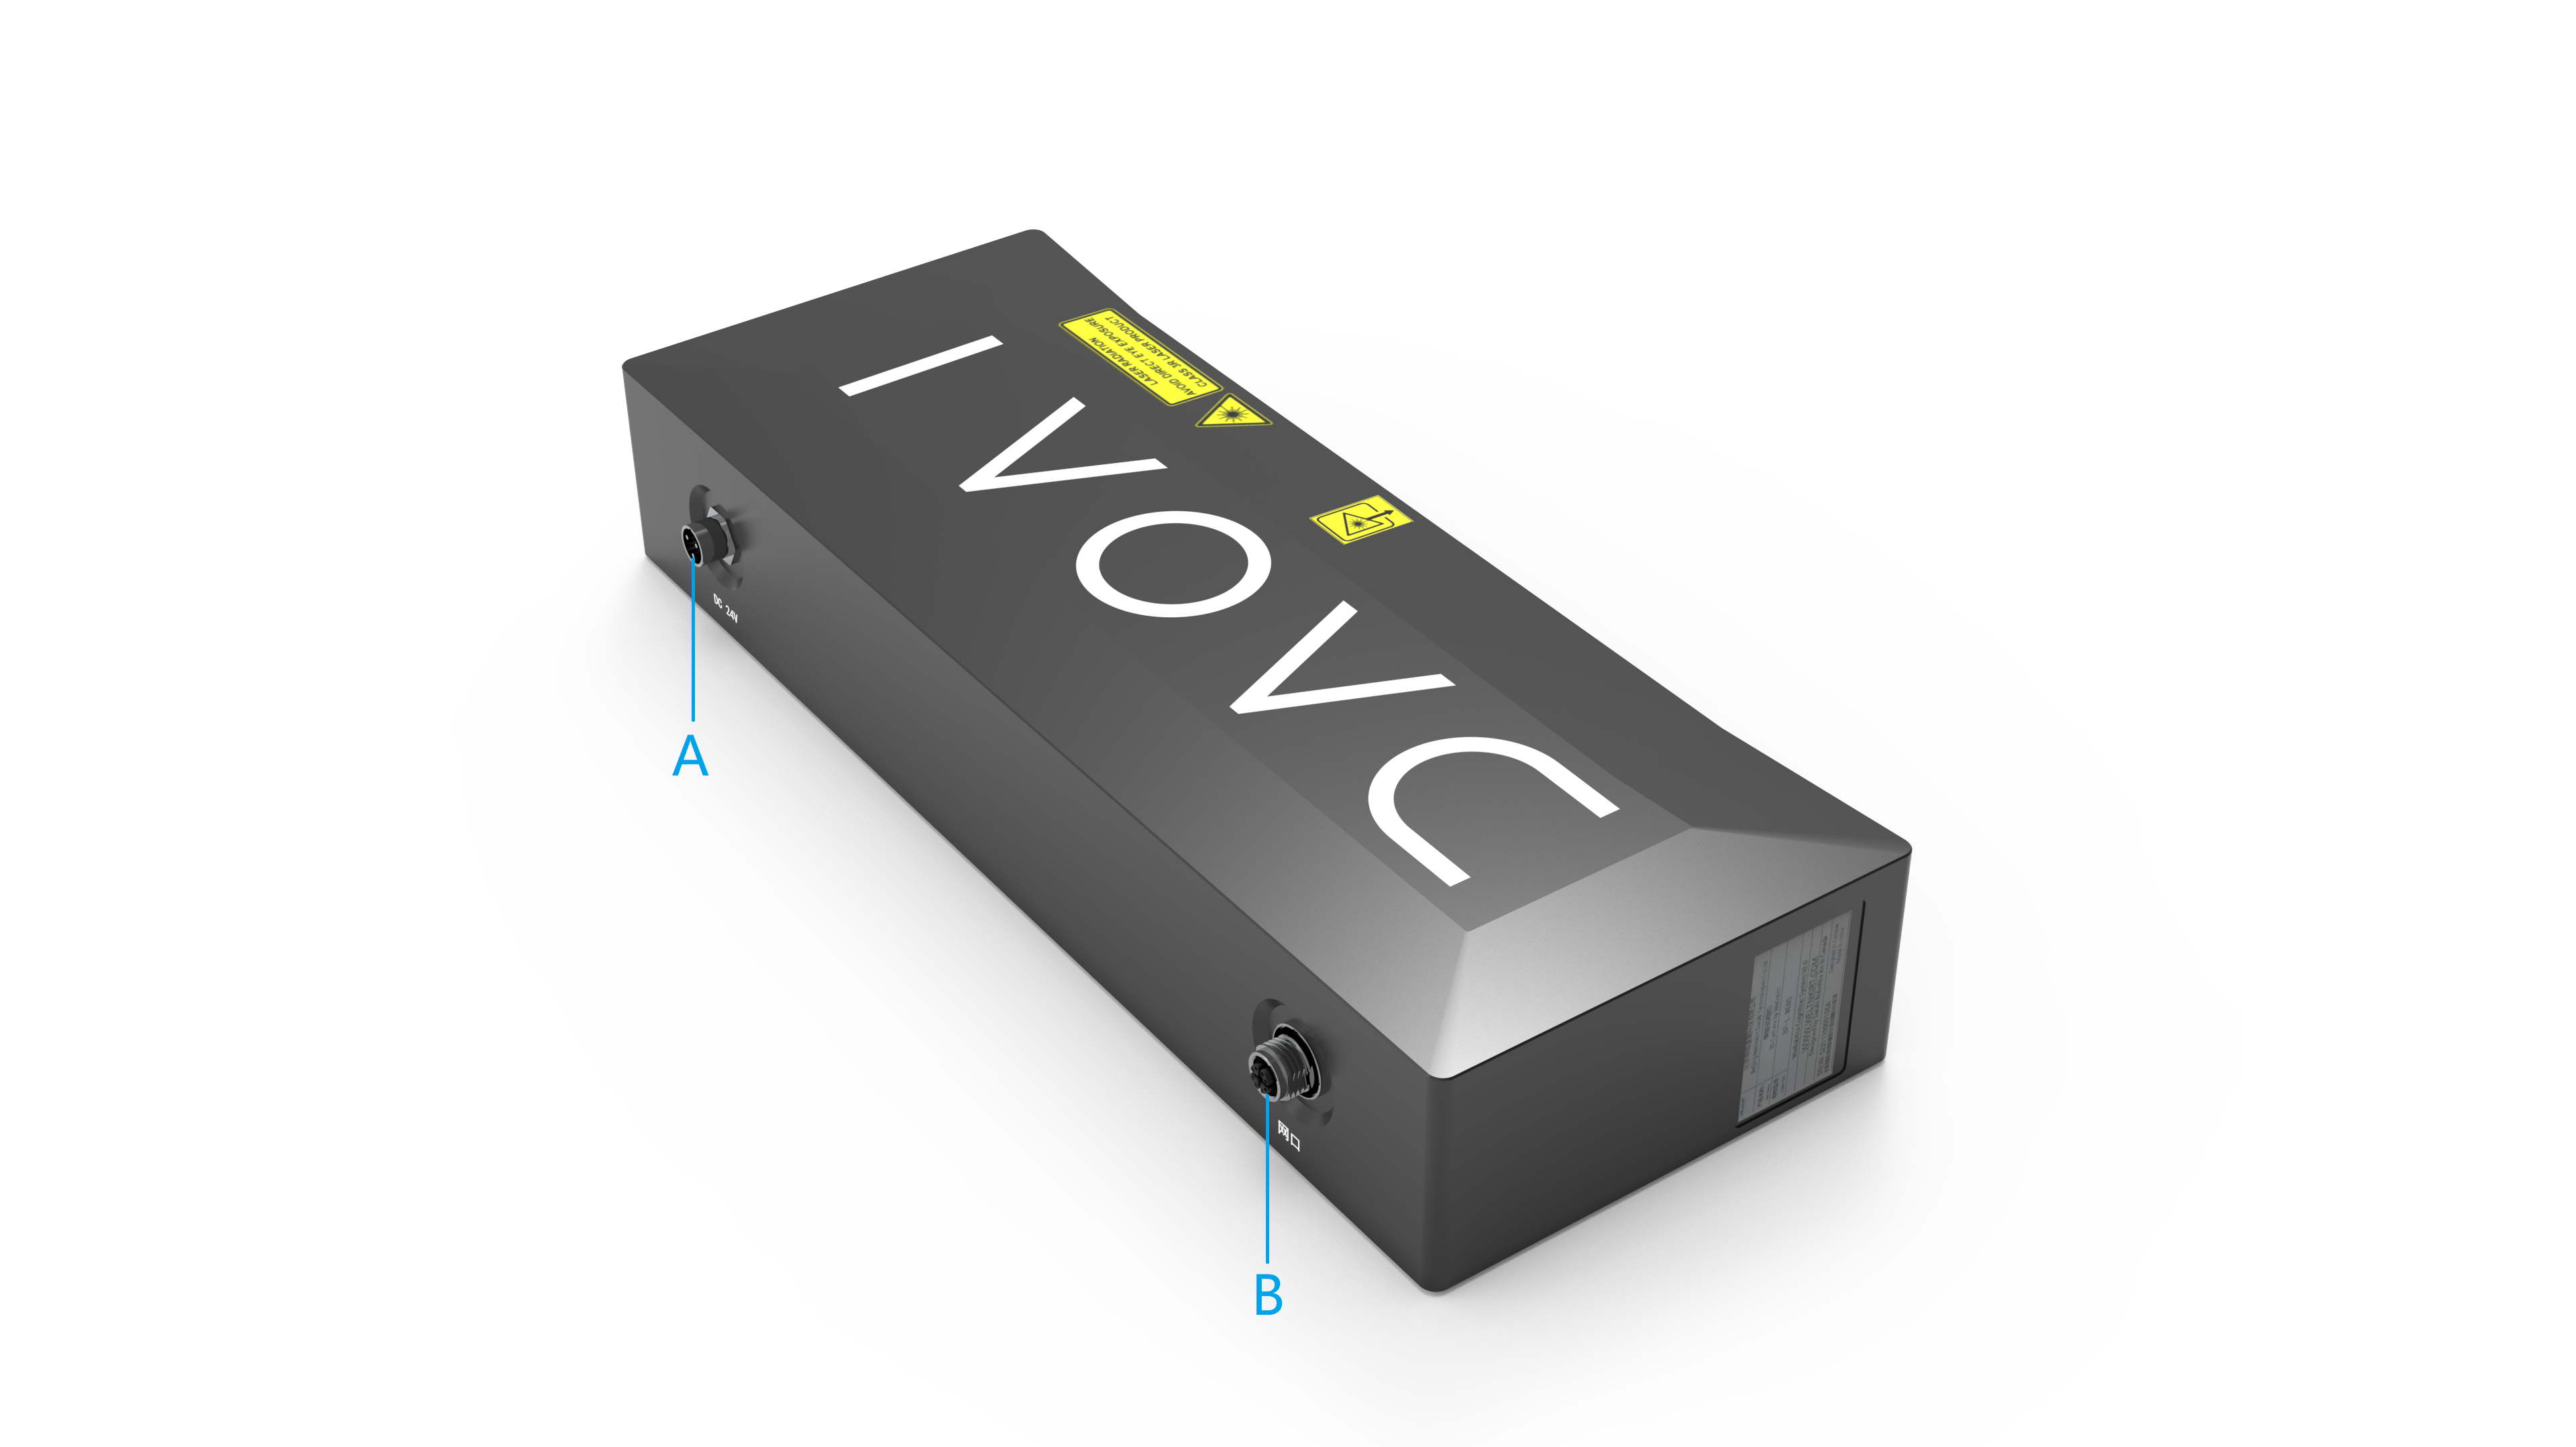
Connectors

Power Connector 24V, 10A DC
Ethernet Connector CAT 6 or higher
Power Connector 24V, 10A DC
Ethernet Connector CAT 6 or higher
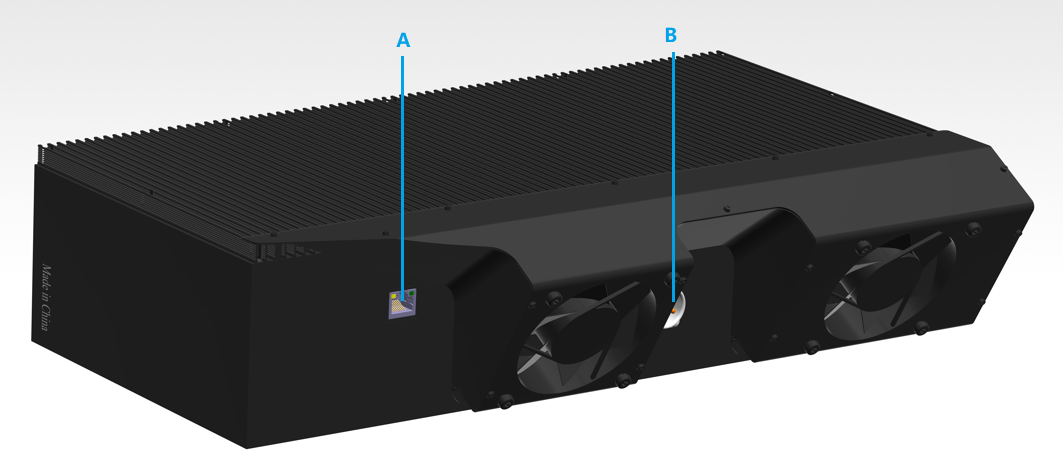
Ethernet Connector CAT 6 or higher
Power Connector 24V, 15A DC
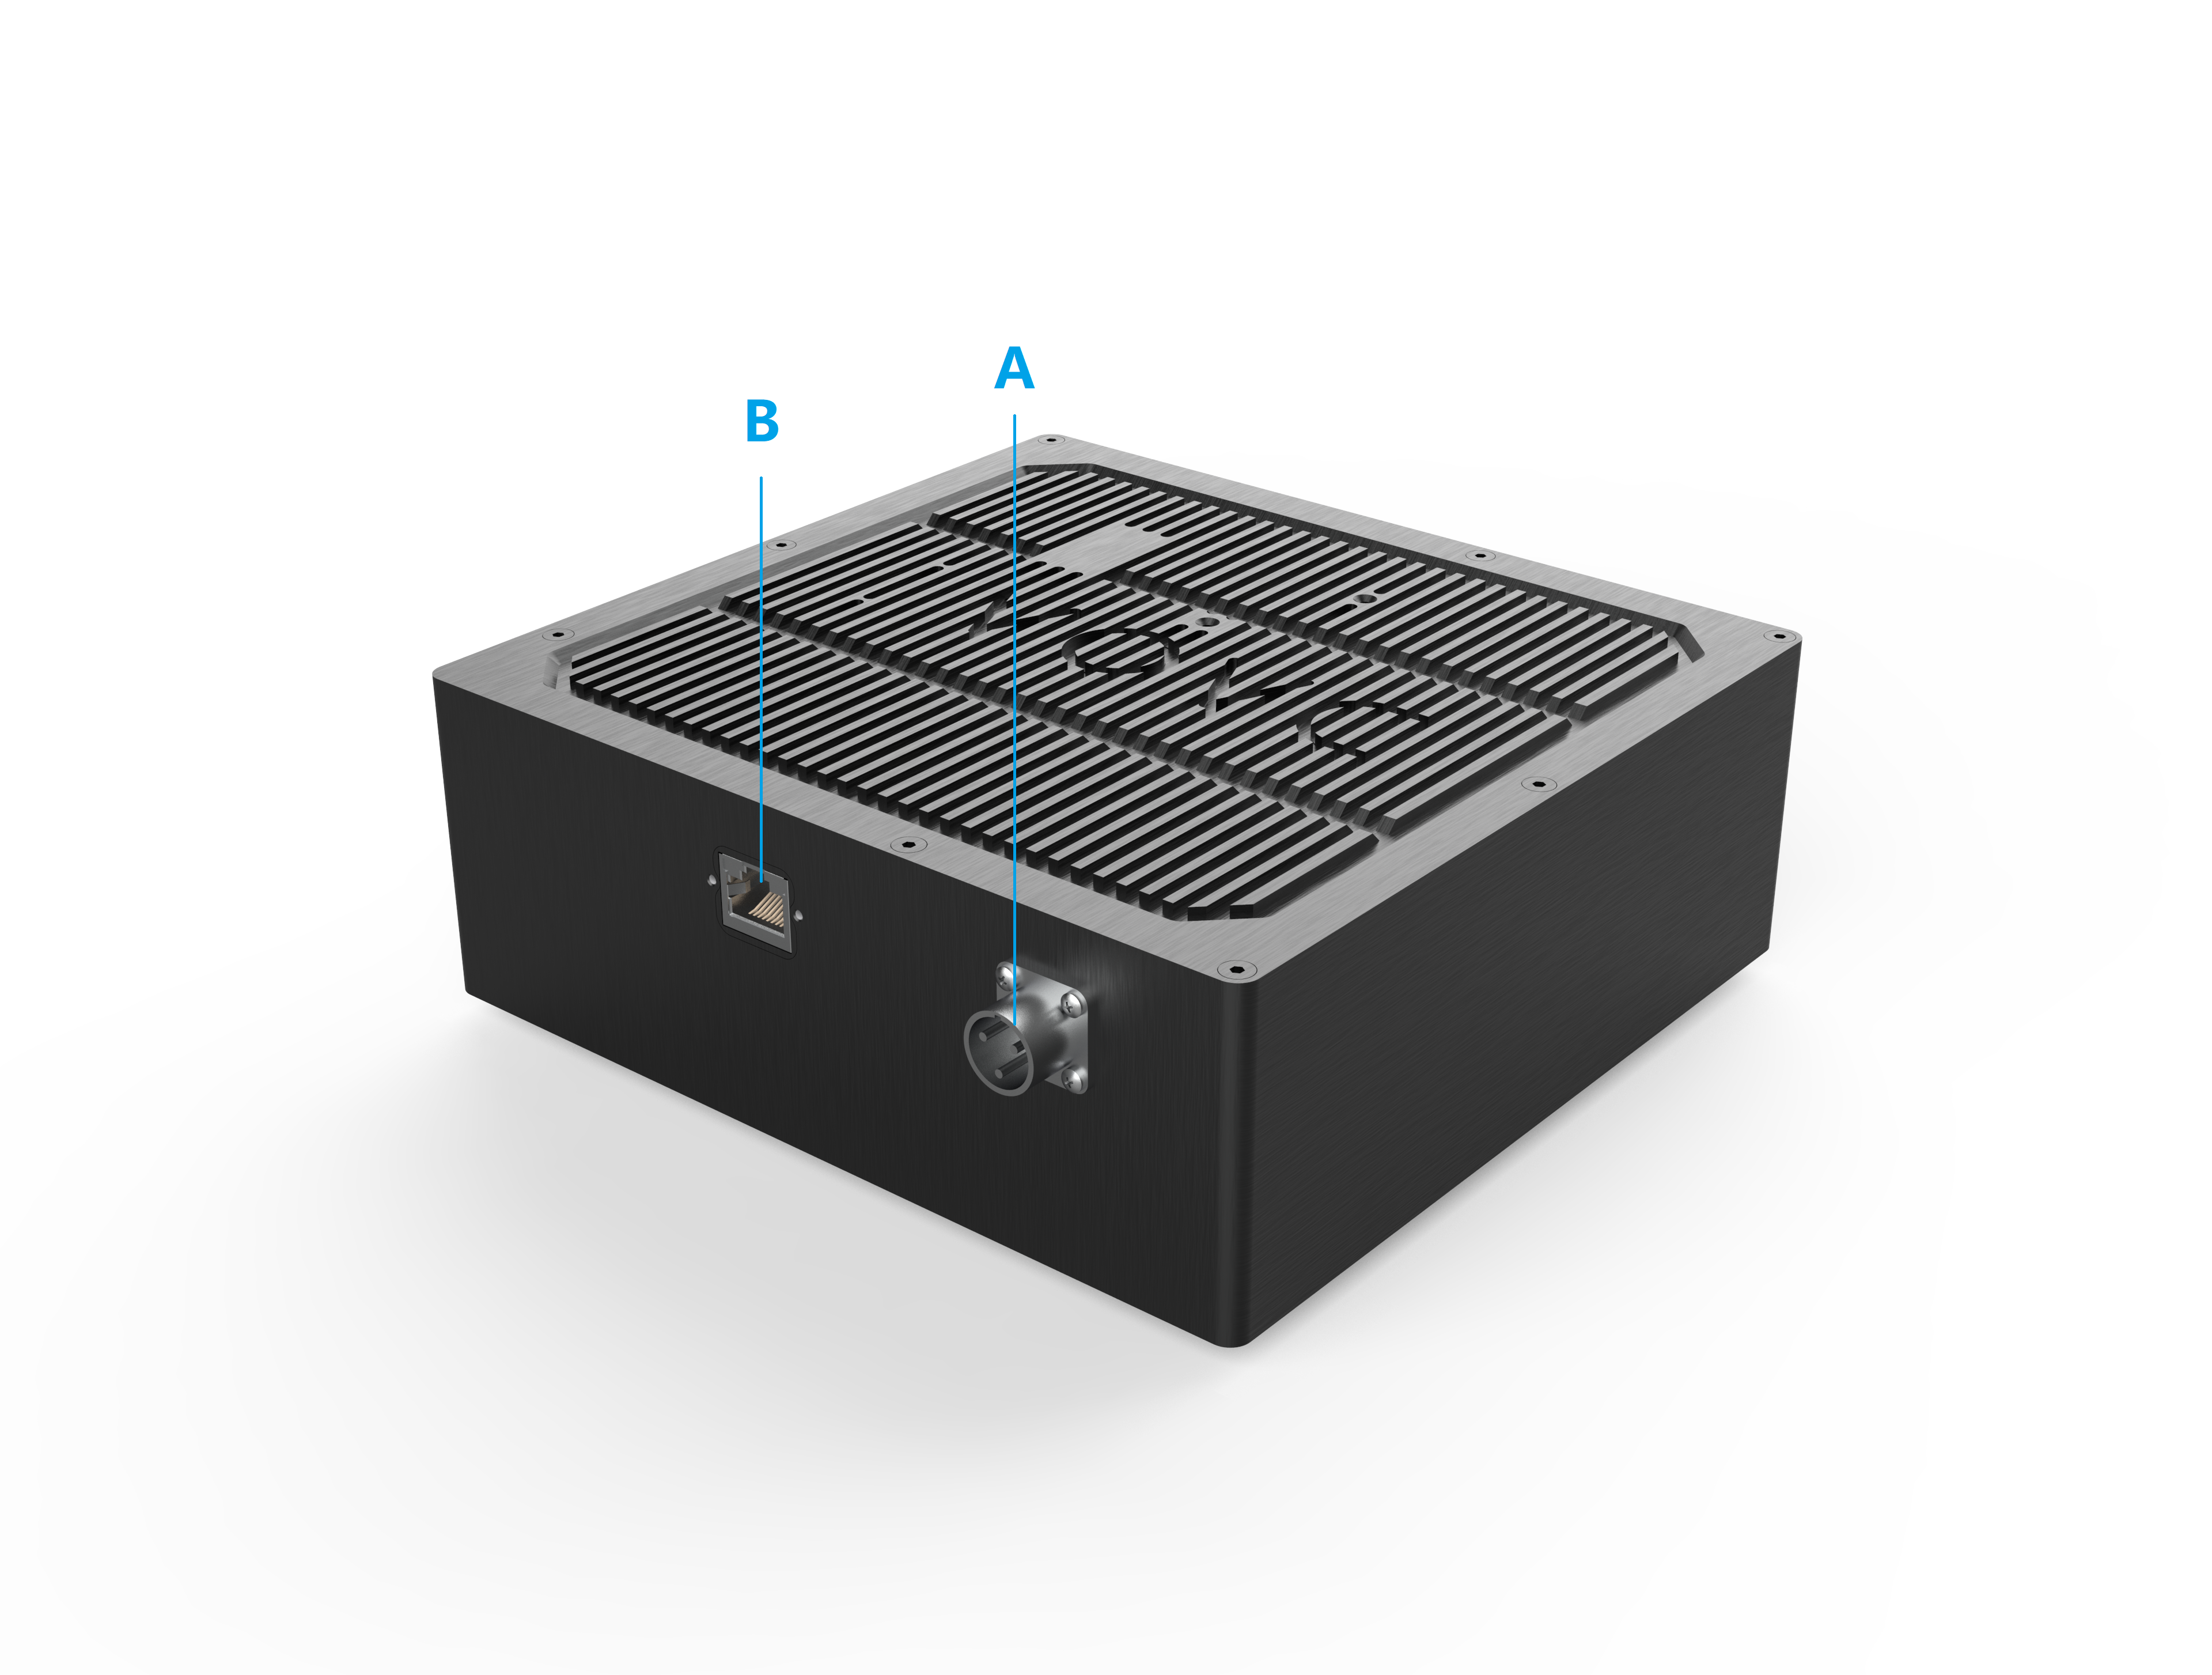
Power Connector 24V, 10A DC
Ethernet Connector CAT 6 or higher
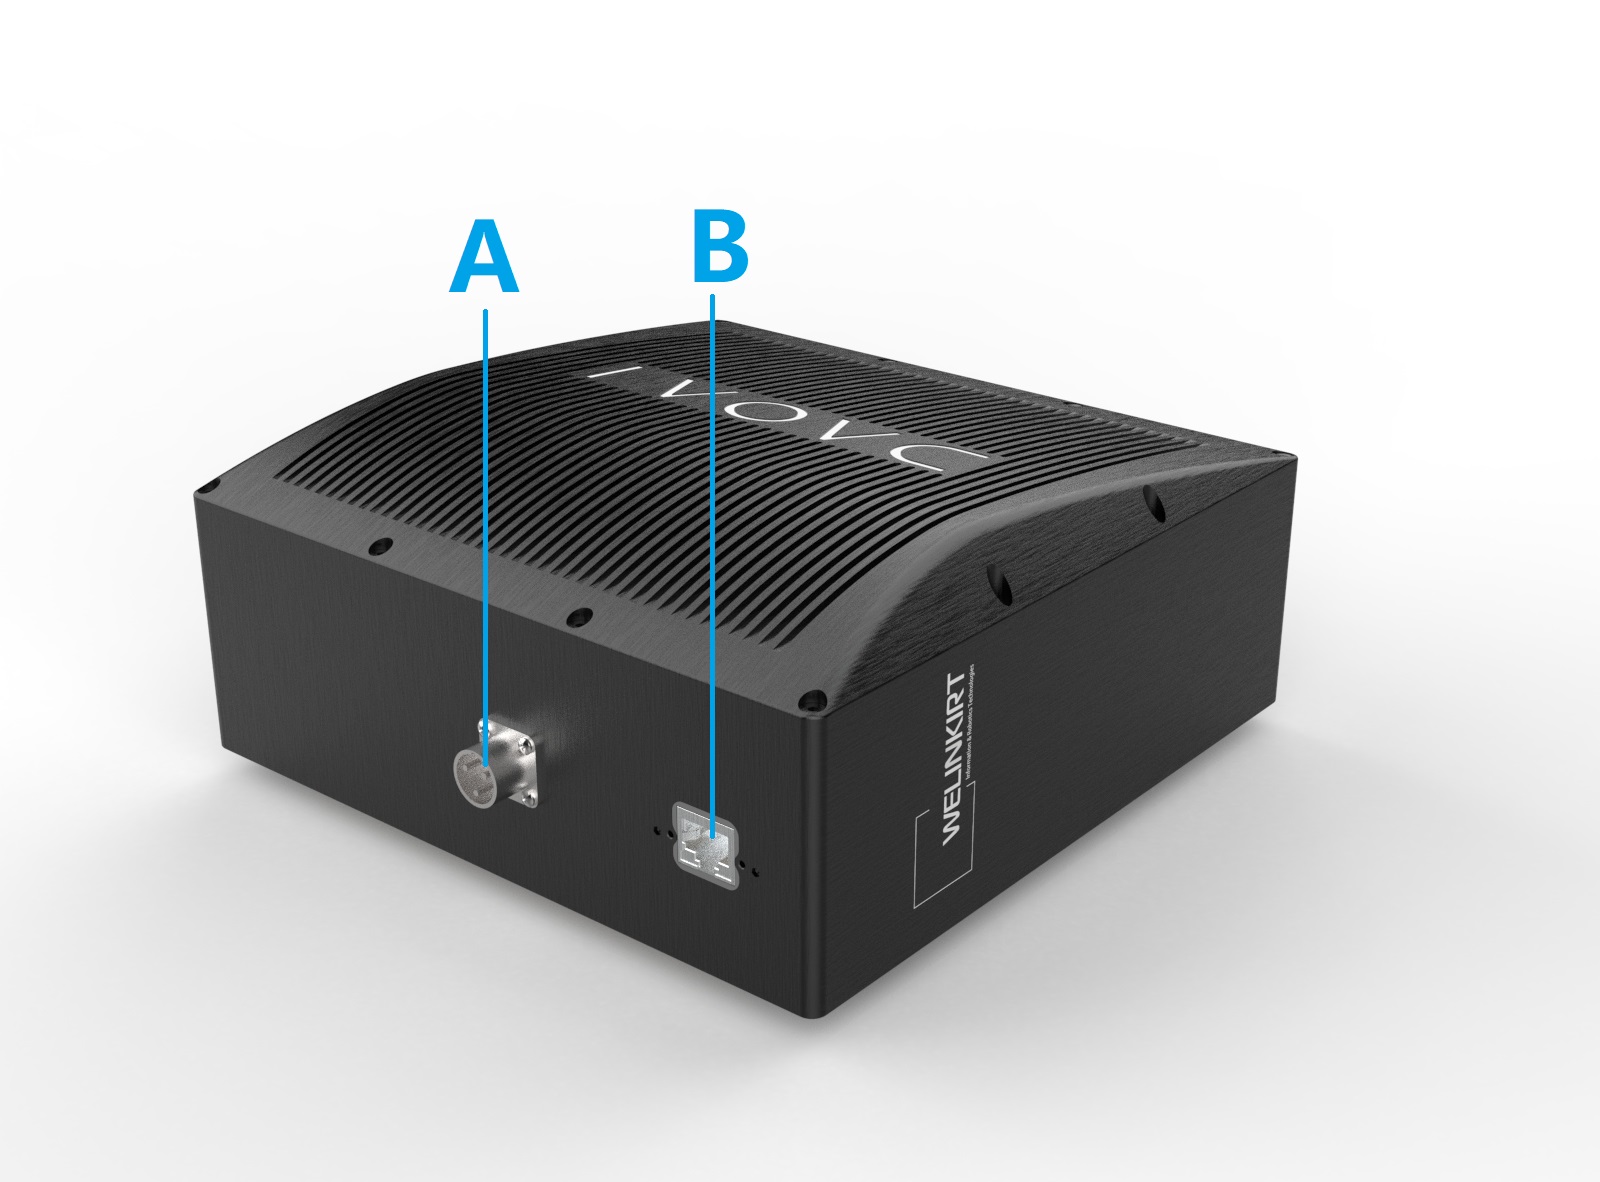
Power Connector 24V, 10A DC
Ethernet Connector CAT 6 or higher
Power Connector 24V, 15A DC
Ethernet Connector CAT 6 or higher
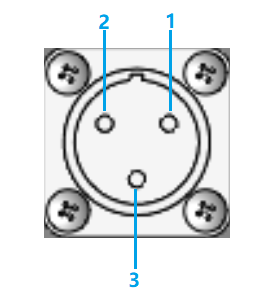
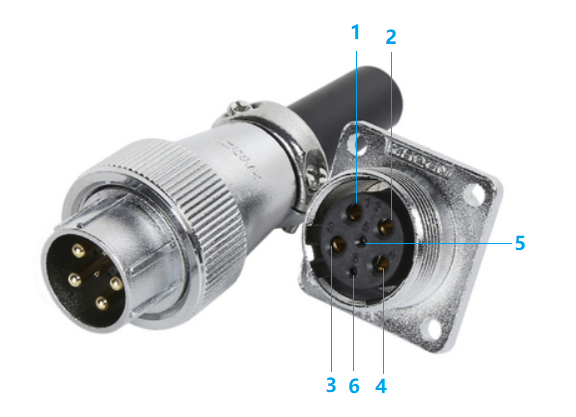
Power supply interface
Pinout |
Pin |
Purpose |
|---|---|---|
|
1 |
DC24V |
2 |
GND |
|
3 |
Reserved, do not connect |
Pinout |
Pin |
Purpose |
|---|---|---|
|
1 |
DC24V |
2 |
GND |
|
3 |
Reserved, do not connect |
|
4 |
Reserved, do not connect |
|
5 |
Reserved, do not connect |
|
6 |
Reserved, do not connect |
Pinout |
Pin |
Purpose |
|---|---|---|
|
|
1 |
DC24V |
2 |
GND |
|
3 |
Reserved, do not connect |
|
4 |
Reserved, do not connect |
|
5 |
Reserved, do not connect |
|
6 |
Reserved, do not connect |
Pinout |
Pin |
Purpose |
|---|---|---|
|
|
1 |
DC24V |
2 |
GND |
|
3 |
Reserved, do not connect |
Pinout |
Pin |
Purpose |
|---|---|---|
|
|
1 |
DC24V |
2 |
GND |
|
3 |
Reserved, do not connect |
Pinout |
Pin |
Purpose |
|---|---|---|
|
|
1 |
DC24V |
2 |
GND |
|
3 |
Reserved, do not connect |
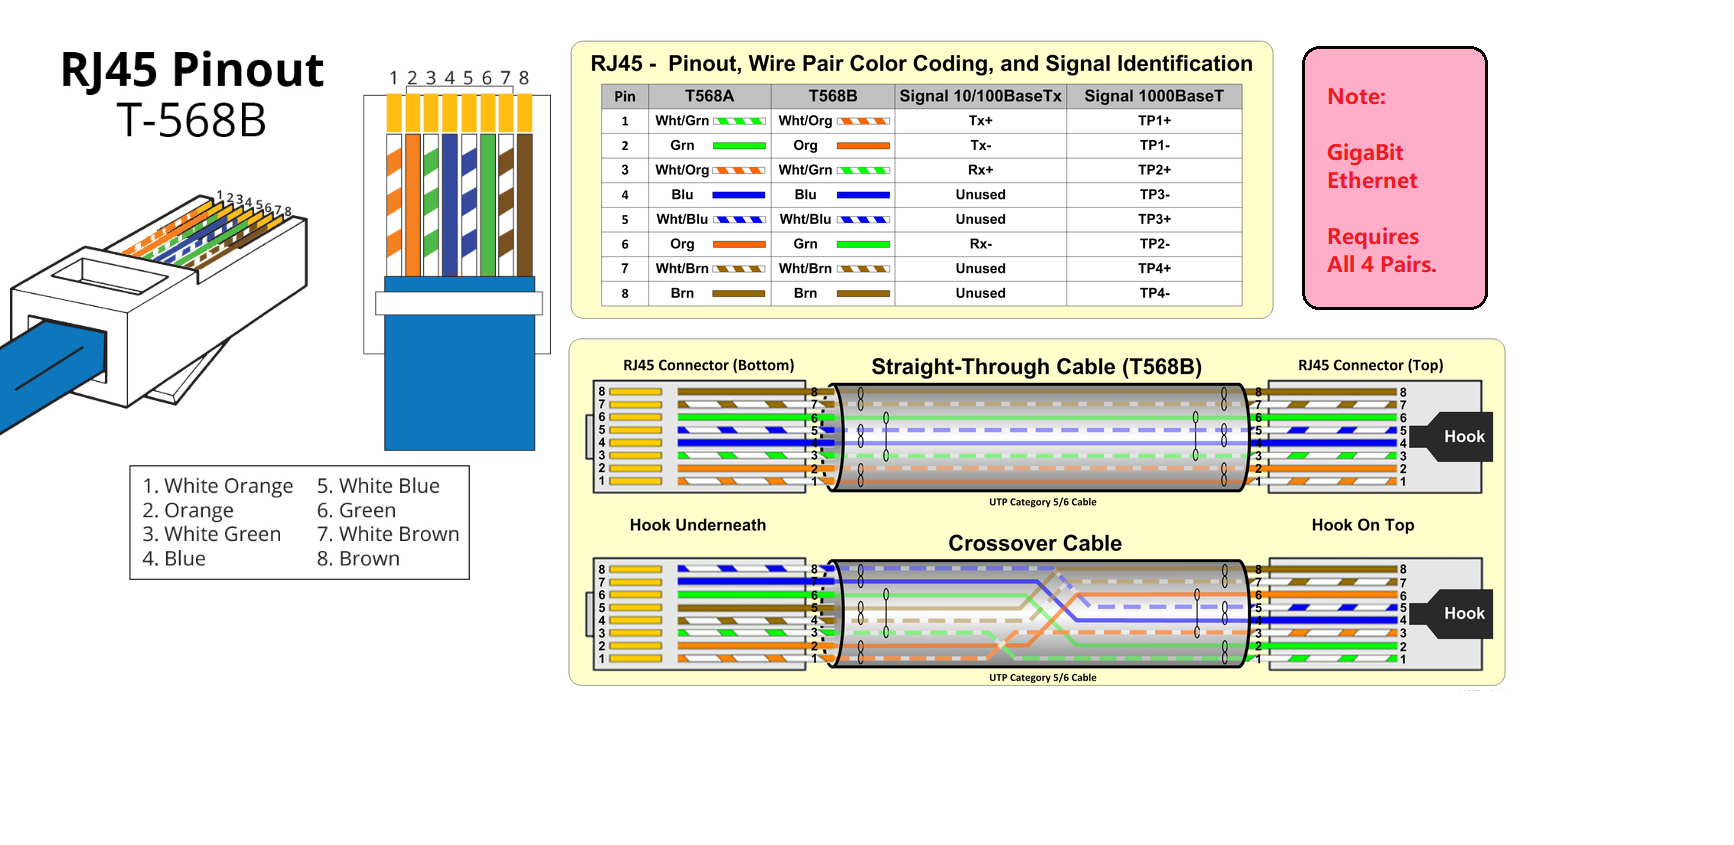
Data cable
BP Small use a ethernet cable for data transmission.
The table below provides the ethernet cable pinout.
BP Medium use a ethernet cable for data transmission.
The table below provides the ethernet cable pinout.
BP Large use a ethernet cable for data transmission.
The table below provides the ethernet cable pinout.
BP AMR use a ethernet cable for data transmission.
The table below provides the ethernet cable pinout.
BP AMR-GPU use a ethernet cable for data transmission.
The table below provides the ethernet cable pinout.
BP Laser use a ethernet cable for data transmission.
The table below provides the ethernet cable pinout.
Connecting to the computer
Plug the power supply first into the “24V “
Plug the ethernet cable into the camera and connect it to your computer
Plug the power supply into a power outlet.
Note
On disconnect, follow the procedure in reverse, disconnect mains power first.
Ensure that all connections are screwed in tightly.
Check System Requirements for performance considerations
Use the AC/DC adapter supplied with the unit to ensure compliance with emission and immunity standards.
The DaoAI BP Small camera uses Ethernet communication and needs 1 Gbps for performance.
- Network Topology
The DaoAI BP Small camera supports the following network topologies:
Direct connection |
|---|
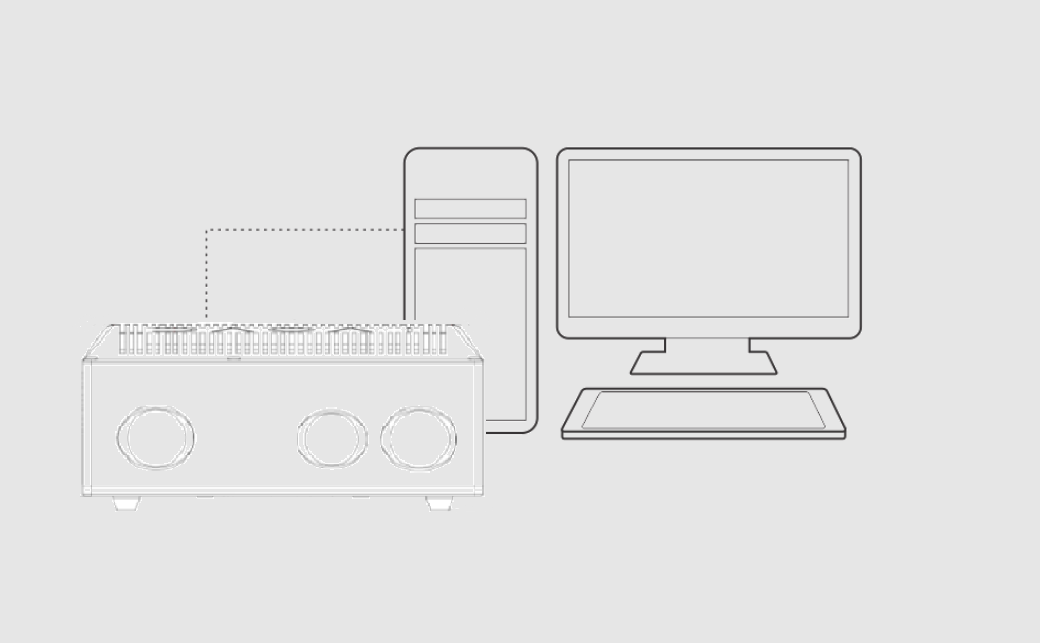
|
Continue to Software Installation where you will also find Network Configuration.
Plug the power supply first into the “24V”
Plug the ethernet cable into the camera and connect it to your computer
Plug the power supply into a power outlet.
Note
On disconnect, follow the procedure in reverse, disconnect mains power first.
Ensure that all connections are screwed in tightly.
Check System Requirements for performance considerations
Use the AC/DC adapter supplied with the unit to ensure compliance with emission and immunity standards.
The DaoAI BP Medium camera uses Ethernet communication and needs 1 Gbps for performance.
- Network Topology
The DaoAI BP Medium camera supports the following network topologies:
Direct connection |
|---|
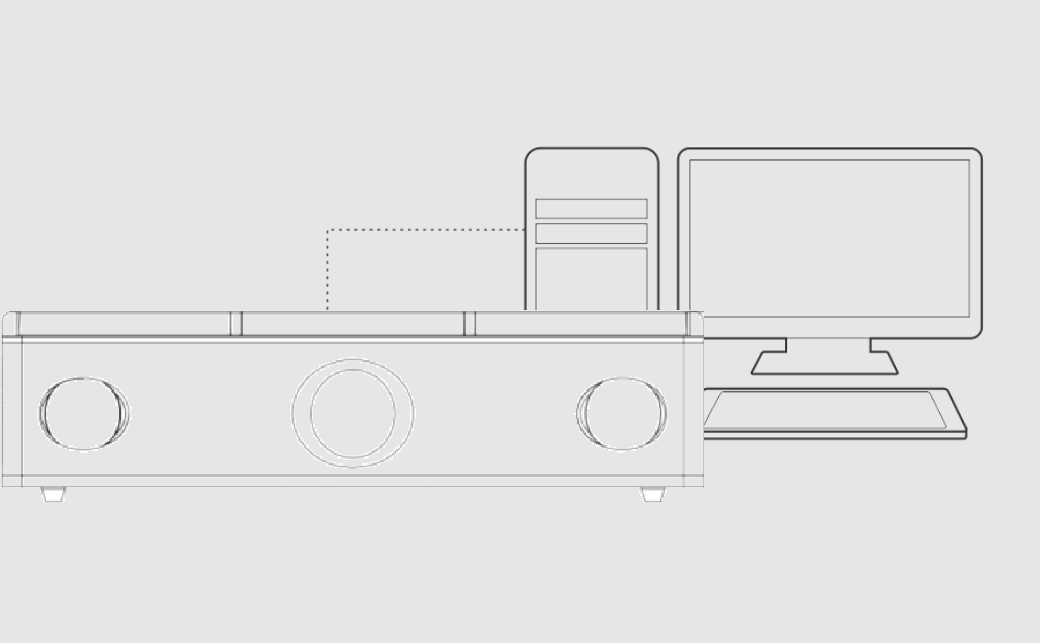
|
Continue to Software Installation where you will also find Network Configuration.
Plug the power supply first into the “24V”
Plug the ethernet cable into the camera and connect it to your computer
Plug the power supply into a power outlet.
Note
On disconnect, follow the procedure in reverse, disconnect mains power first.
Ensure that all connections are screwed in tightly.
Check System Requirements for performance considerations
Use the AC/DC adapter supplied with the unit to ensure compliance with emission and immunity standards.
The DaoAI BP LARGE camera uses Ethernet communication and needs 1 Gbps for performance.
- Network Topology
The DaoAI BP large camera supports the following network topologies:
Direct connection |
|---|
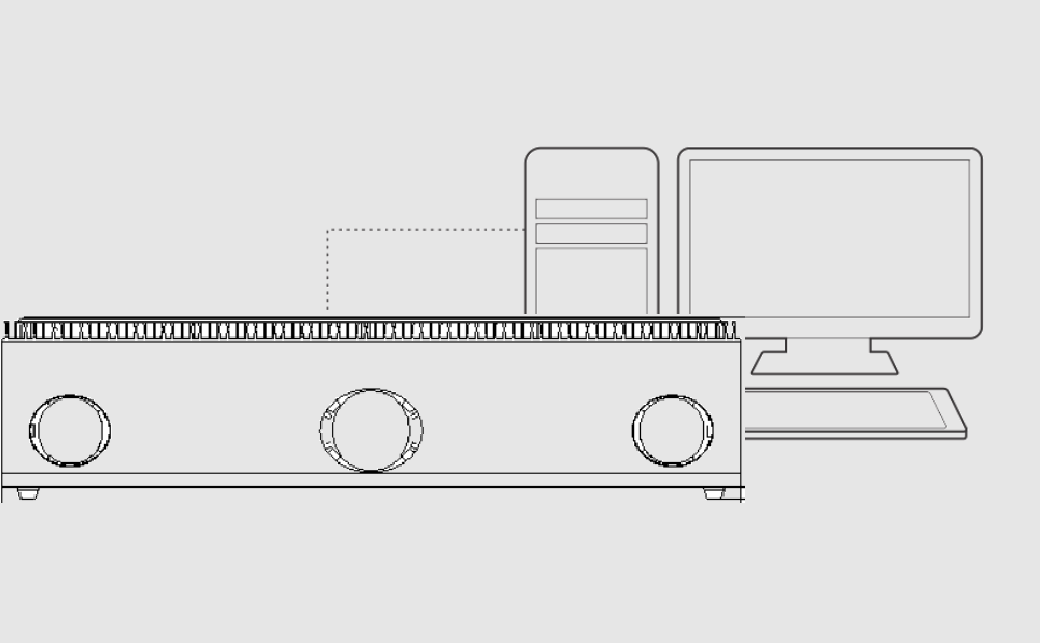
|
Continue to Software Installation where you will also find Network Configuration.
Plug the power supply first into the “24V”
Plug the ethernet cable into the camera and connect it to your computer
Plug the power supply into a power outlet.
Note
On disconnect, follow the procedure in reverse, disconnect mains power first.
Ensure that all connections are screwed in tightly.
Check System Requirements for performance considerations
Use the AC/DC adapter supplied with the unit to ensure compliance with emission and immunity standards.
The DaoAI BP AMR camera uses Ethernet communication and needs 1 Gbps for performance.
- Network Topology
The DaoAI BP AMR camera supports the following network topologies:
Direct connection |
|---|
|
|
Continue to Software Installation where you will also find Network Configuration.
Plug the power supply first into the “24V”
Plug the ethernet cable into the camera and connect it to your computer
Plug the power supply into a power outlet.
Note
On disconnect, follow the procedure in reverse, disconnect mains power first.
Ensure that all connections are screwed in tightly.
Check System Requirements for performance considerations
Use the AC/DC adapter supplied with the unit to ensure compliance with emission and immunity standards.
The DaoAI BP AMR camera uses Ethernet communication and needs 1 Gbps for performance.
- Network Topology
The DaoAI BP AMR-GPU camera supports the following network topologies:
Direct connection |
|---|
|
|
Continue to Software Installation where you will also find Network Configuration.
Plug the power supply first into the “24V”
Plug the ethernet cable into the camera and connect it to your computer
Plug the power supply into a power outlet.
Note
On disconnect, follow the procedure in reverse, disconnect mains power first.
Ensure that all connections are screwed in tightly.
Check System Requirements for performance considerations
Use the AC/DC adapter supplied with the unit to ensure compliance with emission and immunity standards.
The DaoAI BP LASER camera uses Ethernet communication and needs 1 Gbps for performance.
- Network Topology
The DaoAI BP laser camera supports the following network topologies:
Direct connection |
|---|
|
|
Continue to Software Installation where you will also find Network Configuration.